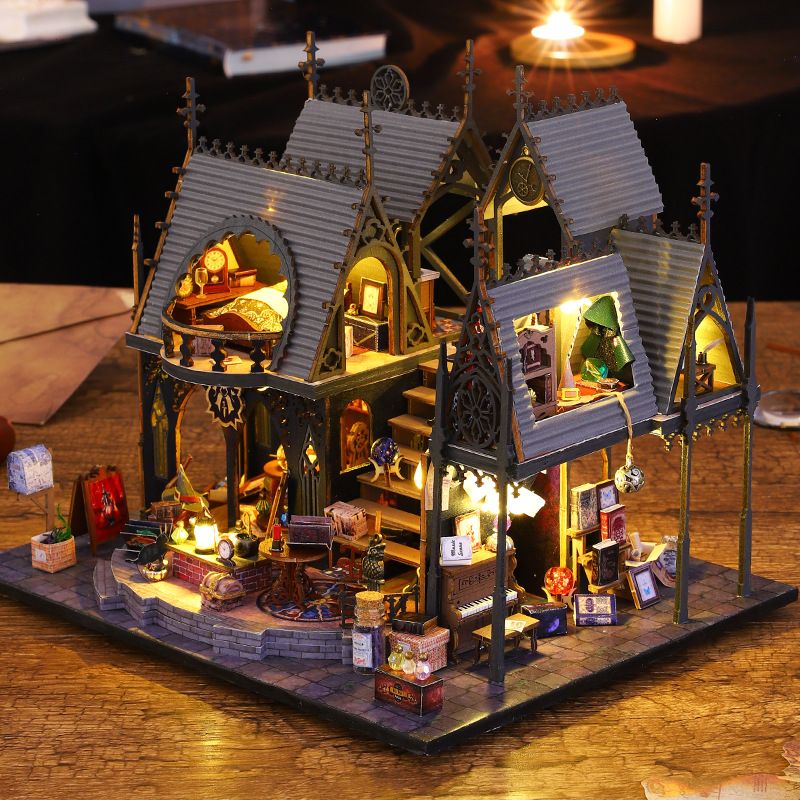
Crafting Your Own Creative DIY Miniature House: A Step-by-Step Guide

Creating a unique DIY miniature house is an exciting and rewarding endeavor that allows you to bring your imagination to life. Whether you're envisioning a whimsical fairy tale cottage, a modern urban oasis, or a rustic countryside escape, follow this step-by-step guide to transform your creative vision into a tangible masterpiece.
Step 1: Spark Your Imagination
Begin by brainstorming and sketching your ideas. What kind of miniature house do you want to create? Consider the architectural style, setting, and theme. Let your imagination run wild and explore different concepts until you find one that resonates with you.
Step 2: Gather Materials
Collect the necessary materials for your project. This may include cardboard, wood, craft paper, fabric, miniature furniture, and any decorative elements you have in mind. Upcycling and repurposing items can add a unique touch to your creation.
Step 3: Plan Your Design
Create a rough layout of your miniature house. Determine the size and shape of each room, as well as the overall structure. Sketch a floor plan and decide on the placement of doors, windows, and partitions. This planning phase will help guide your construction process.
Step 4: Build the Foundation
Construct the base and framework of your miniature house according to your design. Use sturdy materials to ensure stability. Assemble walls, floors, and ceilings, and make sure everything fits together securely.
Step 5: Bring it to Life
Add walls, windows, and doors to each room. Create a roof that complements the overall style of your miniature house. Be attentive to details, such as decorative trim, balconies, and awnings. This is where your vision starts taking shape.
Step 6: Decorate and Furnish
Now comes the fun part – decorating and furnishing your miniature house! Use craft paper to mimic wallpaper or paint the walls in your chosen colors. Add miniature furniture, rugs, and accessories to bring each room to life. Get creative with DIY decorations, like tiny paintings or potted plants.
Step 7: Personalize with Details
Infuse your miniature house with personalized details that tell a story. Create a tiny bookshelf with miniature books, place a tiny tea set on a dining table, or add a miniature garden outside the front door. These details add character and depth to your creation.
Step 8: Finishing Touches
Inspect your DIY miniature house for any finishing touches it might need. Ensure that all elements are securely glued and that the structure is stable. Make any necessary adjustments to perfect your masterpiece.
Step 9: Display and Share
Once your creative DIY miniature house is complete, display it proudly in your home. You can place it on a shelf, in a glass display case, or even create a miniature diorama to showcase your creation. Share your work on social media or with friends and family to inspire others with your unique vision.
Step 10: Embrace the Journey
Creating your own DIY miniature house is not just about the end result; it's about the journey of exploration, creativity, and self-expression. Embrace the process, learn from each step, and enjoy the satisfaction of turning your imaginative ideas into a tangible work of art.
With determination, creativity, and a touch of craftsmanship, you can bring your unique DIY miniature house to life and share your creative vision with the world. Happy crafting! 🏠✨


